When sending a request it is important to give your contact the best possible user experience. One way to improve this is by creating a welcoming and explanatory landing page. This manual will explain you how to edit your custom flow's landing page
How to edit your landing page
-
Go to app.penbox.io and log in
-
In the left most column click on flows
-
click on Your Templates
-
Look up the flow that you want to edit and click on Edit in studio
-
-
-
On the left side of the screen under Menu, click on Landing
You have now arrived on the page to edit the landing page. See below which variables you can edit.
Landing page configuration settings
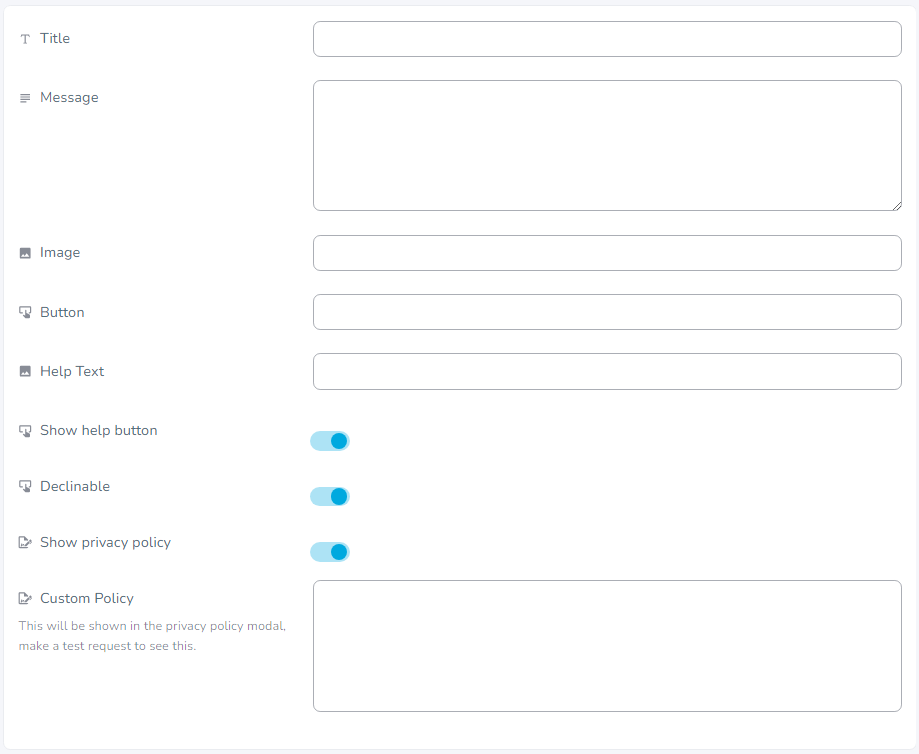
| Title | This is the title of the landing page. The title is often used to welcome the user to the flow. |
| Message | This is text will be displayed under the title. This text is often used to explain why the contact has to fill in the flow. |
| Image | You can upload a link to an image here. This image will be displayed above the title. |
| Button | Here you can edit the text displayed in the button that is used to access the flow. |
| Help Text |
This is the text displayed when the contact clicks on help |
| Show help button |
Here you can chose to display the help button to the contact |
| Declinable |
Here you can chose to give the user to decline filling in the flow |
| Show privacy policy |
Here you can chose to display the privacy policy to the contact |
| Custom Policy |
Here you can edit extra text to the standard privacy policy that is linked to every flow |
Tip: enter the keys of your Options and Contact Setting elements as {user."key"} or {options."key"} personalize the landing
