Using Penbox, you're provided access to various pre-designed flows. However, you can effortlessly create your custom flows with the help of AI. The manual explains you how to create your on flow in the Studio.
How to create a flow
- Go to app.penbox.io and log in
- Click on Create your flow
- In the Flow Name field, provide a distinct name for your flow. Remember, this name must be unique.
- In the Description field, provide a detailed description of your desired flow content. This information will guide our AI in creating a closely aligned flow based on your preferences.
- Click on Create flow
An new page will open and our Ai will start creating the flow based on your input.

Studio terminology
| Step | With steps you can group questions together. Steps can consist of multiple questions. |
| Element | An element is the content of your flow. This can be a Text & numbers, Choices, Dates or Others. |
| Landing | This is the page your contact see when opening up the flow |
| Invitations | These are the notifications in which the link to the flow is placed |
How to add a step to the flow
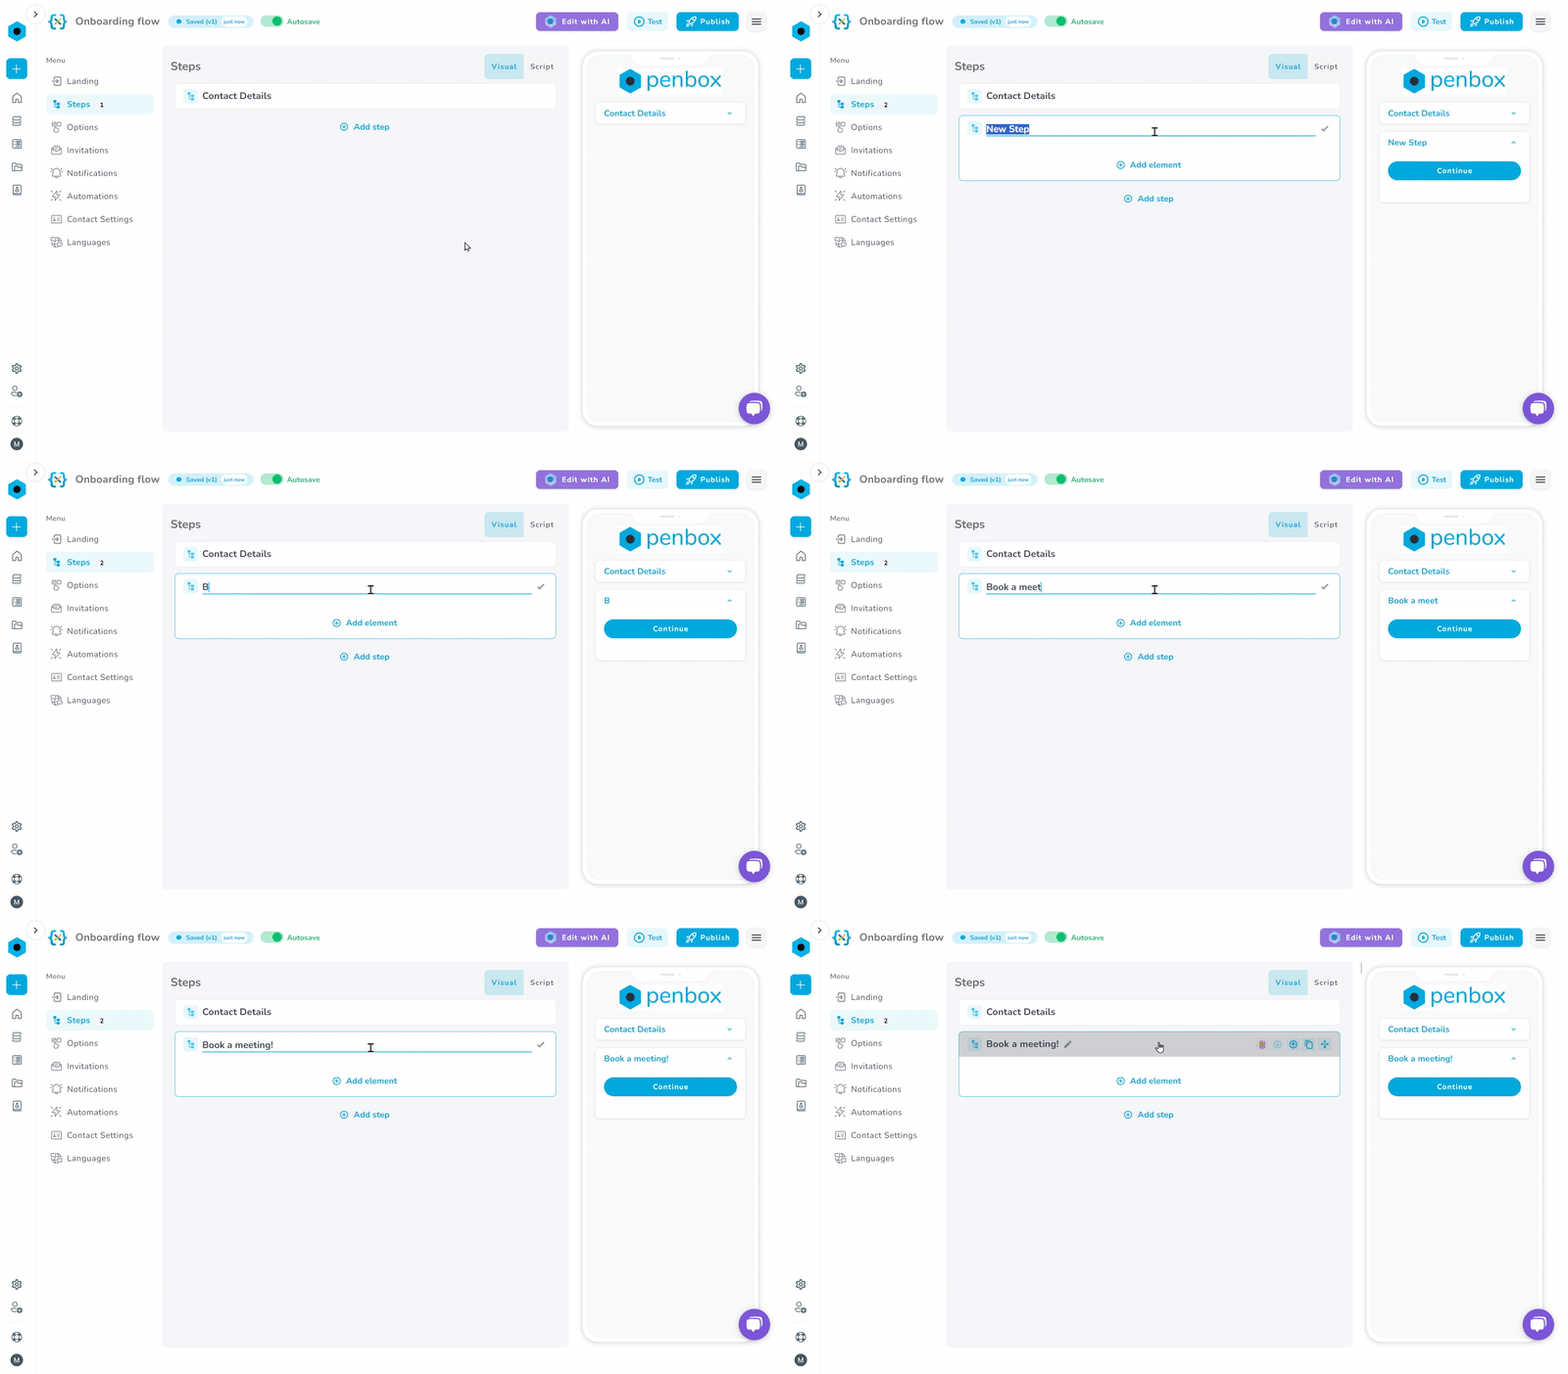
- In the studio click on Steps the in Menu column
- Under the last created step, click on Add step
- Change the title of the step by clicking on New step and changing the title

How to add an element to the flow
- In the studio click on Steps the in Menu column
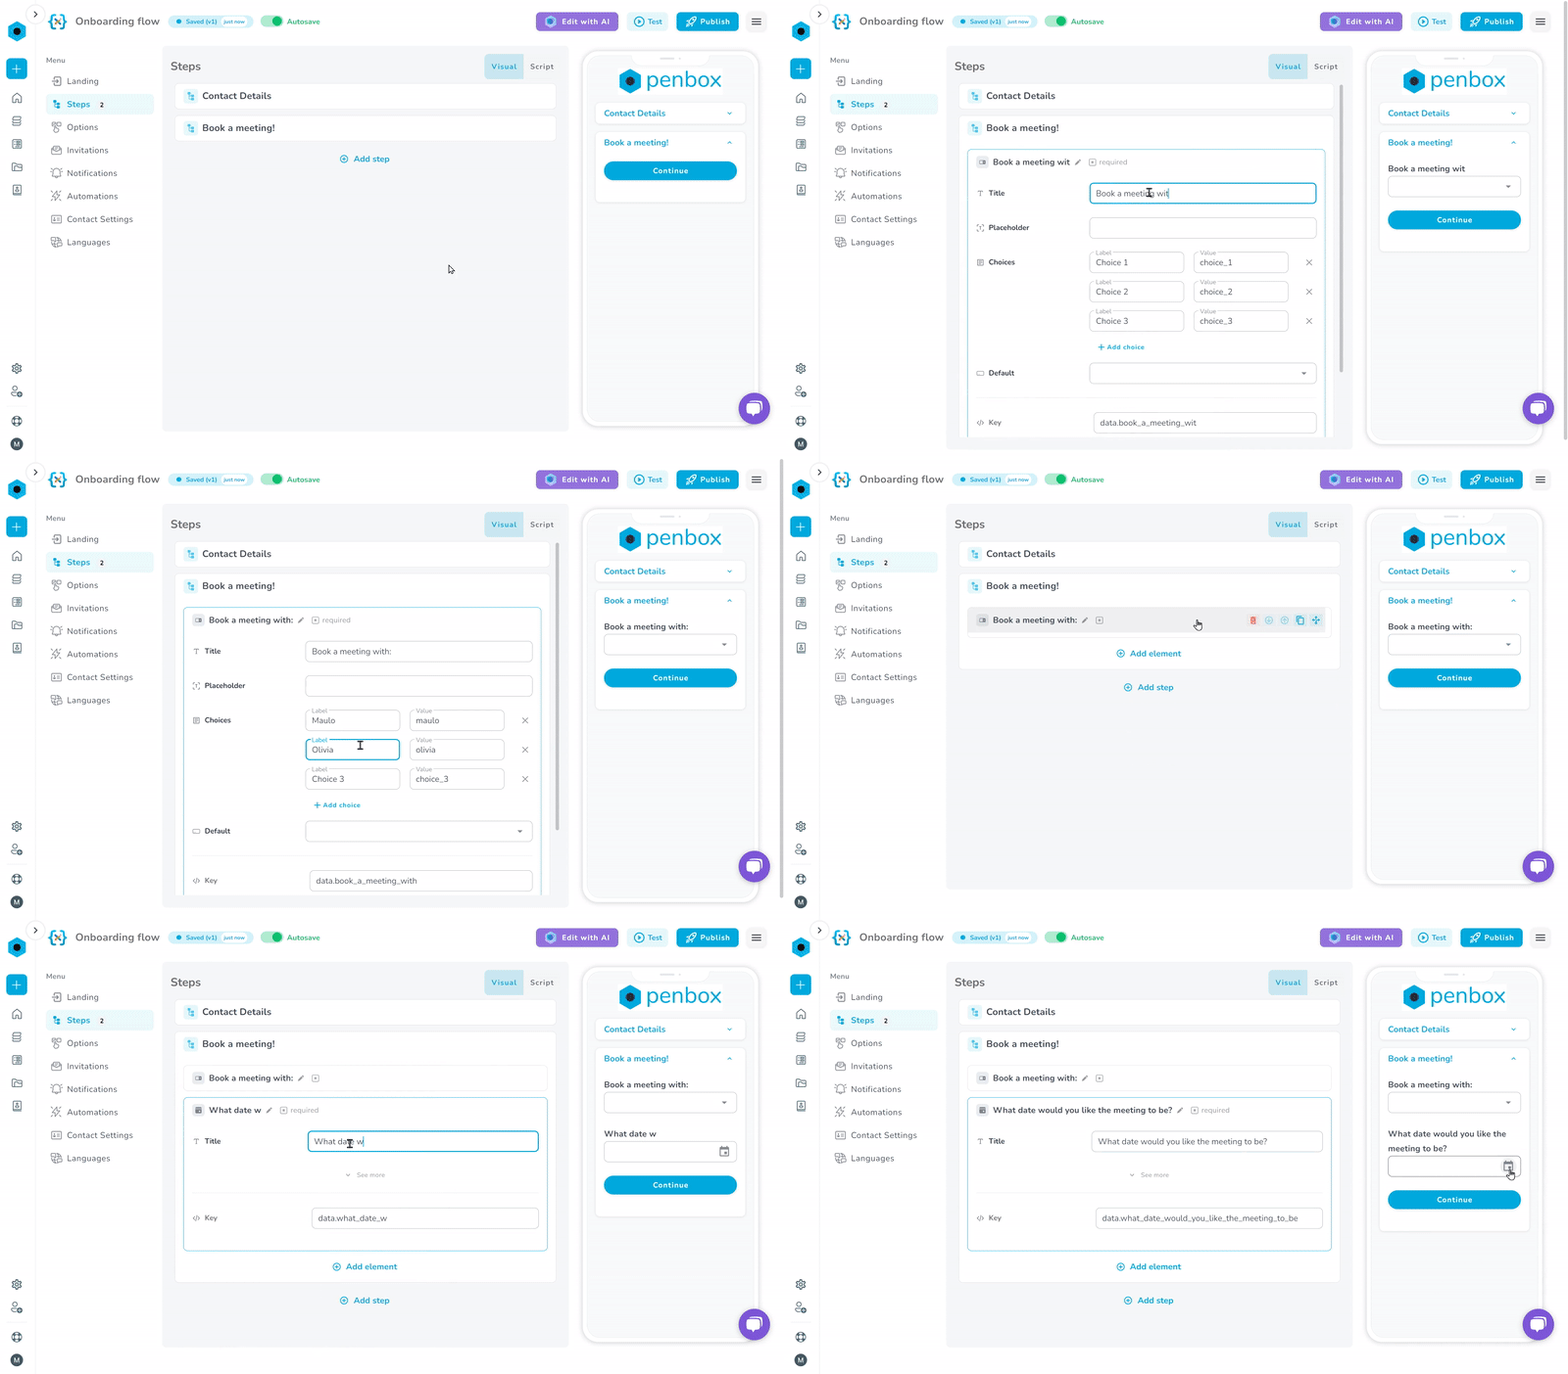
- Click on the step to which you want to add an element
- In the step click on Add element
- Select the element
In the element field:
- Provide the question or text in Title
- Personalize the Key

Note: The key can only consist of letters and underscore (_). The key is used for conditions. Example of a key: data.what_is_your_name
Types of Elements
| Element | Description |
| Text input | This element allows the contact to provide written information. Examples: name, e-mail & Address |
| Number Input | This element allows the contact to provide numerical information. Example: Age, quantity & weight |
| Paragraph | This element only provides information to the contact. A paragraph can for example be used as an introduction to a question. |
| Toggle | A toggle can be used to switch between different options. Example: Allow newsletter |
| Single choice | This element allows the contact to select one option out of multiple |
| Checkbox | This element used to select or deselect action item |
| Checkboxes | This element is similar to a Single choice, however multiple options can be chosen |
| Dropdown | A drop-down menu is a list of options that gets revealed vertically when a contact interacts with it |
| Date | This element allows the input of a date |
| Date & Time | This element allows the input of a date and time |
| Phone Input | This element is for the input of a phone number by the contact |
| Card | A card is similar to a Paragraph, however a card is highlighted |
| File Upload | This element allows the contact to upload files |
| Rating | This element allows the contact to give a rating |
| Image | This element allows the flow builder of the flow to insert an image in the flow |
| Signature | This element allows the builder of the flow to add a document to the flow to be signed. |
