With Penbox, it is possible to place the responses that you and your contact have provided in a flow within a Word document. For example, contracts, evaluation forms, or sick notices. This manual will explain you how to set this up.
The Word fill feature is only applicable for flows made in the Studio. This manual will consist of 3 steps. Follow each step in the presented order.
Step 1. Create the Word document
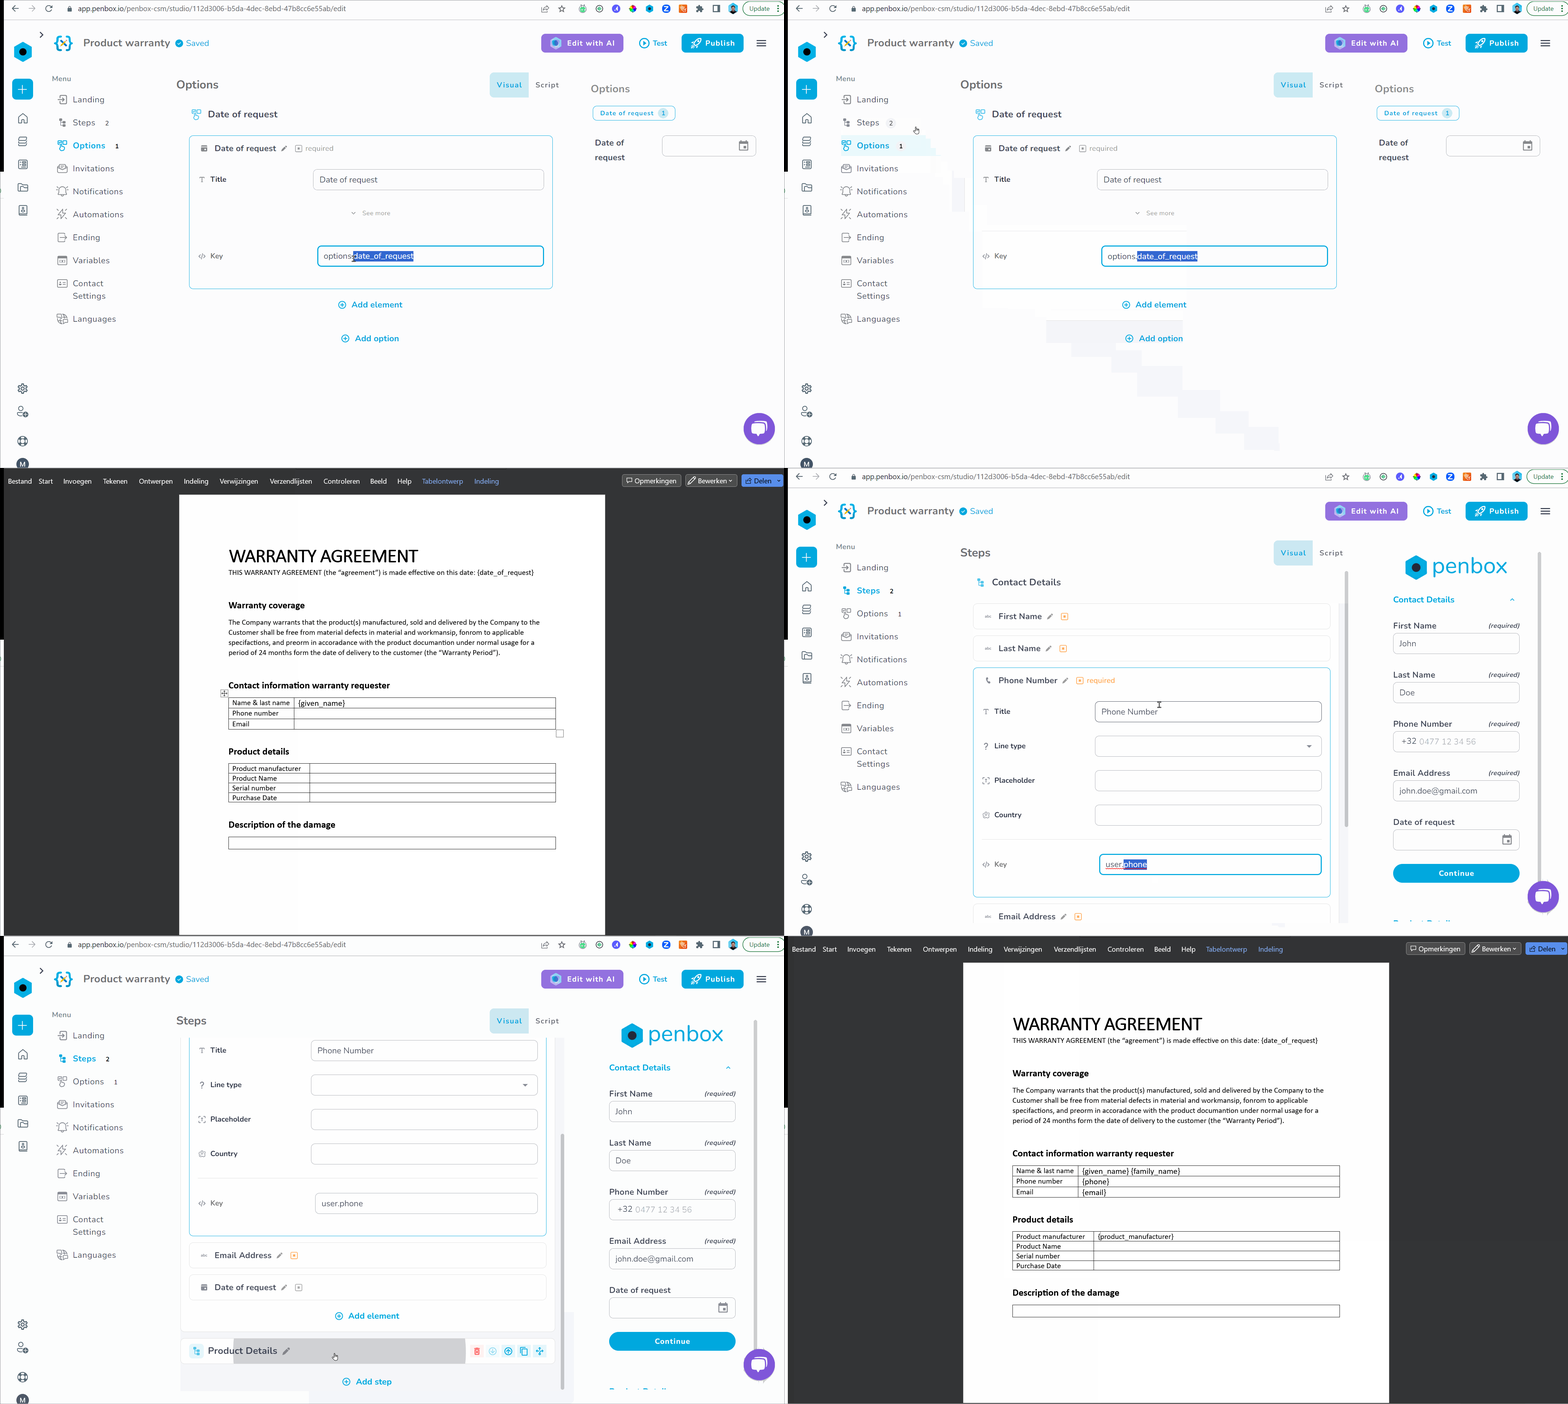
You flow contains many elements with keys decide for each elements of which you want the outcome to be represented in the Word document a variable name. For example: {user.given_name} will be named {given_name}.
In your Word document, enclose the variable name of the elements to which you want responses to be presented within curly brackets { }.
Note: you can set the variable name the same as the element key.
Examples:
- Element key: user.given_name
- Varialbe name to be placed in the Word document: {given_name}
- Element key: data.what_is_the_name_of_your_doctor
- Variable name to be placed in the Word document: {doctor_name}
- Variable name to be placed in the Word document: {doctor_name}
Note: You can use the suffix __title or __formatted to obtain the question or the response. (Works only with data. variables)
Examples:
-
Example: Adding __title to the variable
data.product_name→{data.product_name__title}will display the title of the question: "What is the product name?" -
Example 2: Adding __formatted to the variable
data.product_name→{data.product_name__formatted}will display the formatted response value: "Product name." This also works with dates, formatting them for optimal display, or with lists, showing the name of the selected item.

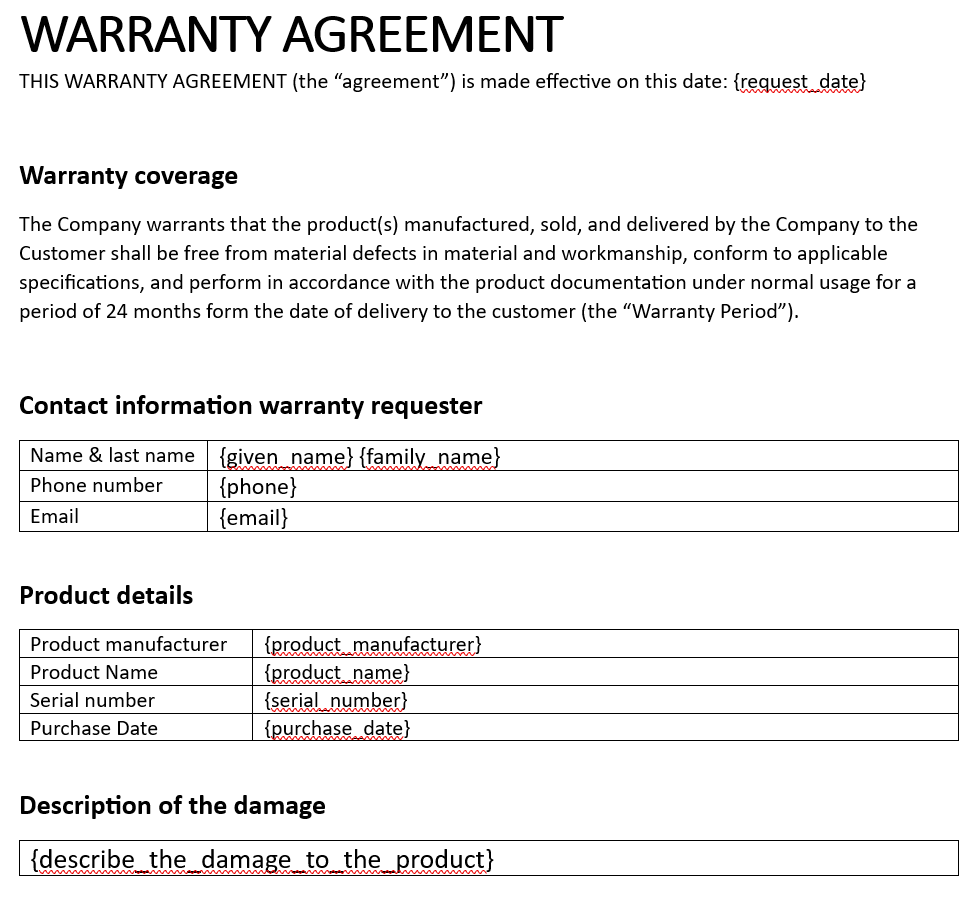
After adding all your variable names to your document will look something like this:

Step 2. Add the download element to your flow and upload the Word document
After completing the Word document, add the download element to your flow. In your flow:
- Click on Add Element
- Select the File Download element
- Edit the title of the element.
- Upload the Word document

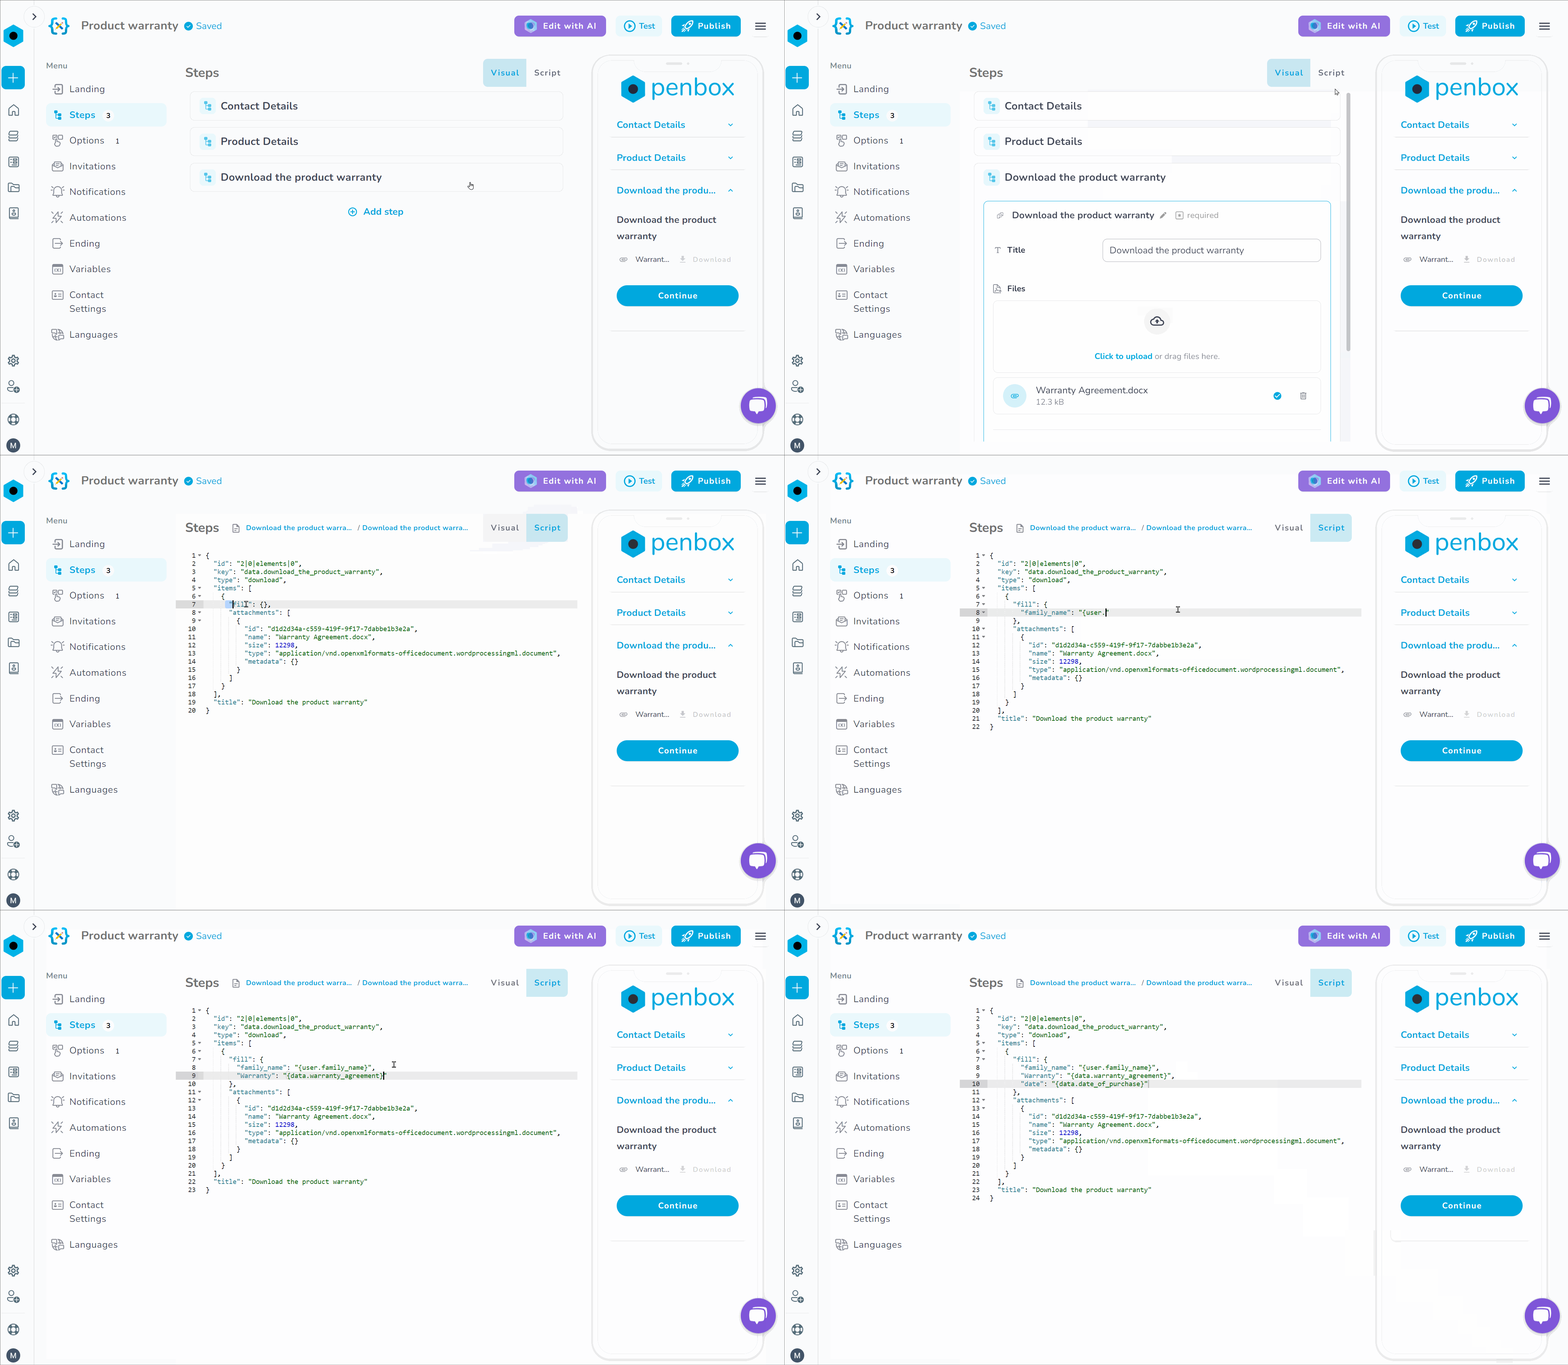
Step 3. In script mode, add a line of code to the File Download element and publish the flow
Make sure to do this step after completing the flow since it needs to be published to save the changes.
- Open the File Download element by clicking on it.
- Click on the center-column's right corner on Script
- Around line 17 you will find the code "fill": { }
- In between the curly brackets of "fill"{ } define the variable name and to which key it is assigned to as this: "variable_name": "{element_key}",
Note: each variable should be separate with a comma (,) except for the last variable

When the contact opens the flow, fills it in, and clicks on download your Word document will appear with the prefilled information.
End result
When your contact completes the flow and downloads the attached document, they will receive a Word document that has been filled in with the information provided by both you and the contact.
